
Is your kitchen exhaust fan filter covered in stubborn grease and grime? If you’ve ever struggled with a greasy filter that slows down your fan and fills your kitchen with lingering odors, you’re not alone.
Cleaning it might seem like a tough job, but what if you could restore your filter’s shine quickly and easily? In this guide, you’ll discover simple, effective steps to get rid of that grease buildup and keep your kitchen fresh and safe.
Ready to make your exhaust fan work like new again? Let’s dive in!
Tools And Materials Needed
Cleaning a greasy kitchen exhaust fan filter needs the right tools and materials. This helps remove grease and dirt easily.
Having everything ready saves time and makes the job safer and cleaner.
Dish Soap Or Degreaser
Dish soap cuts through grease and dirt on the filter. A heavy-duty degreaser works well for thick grease.
Choose a soap or degreaser that is safe for metal and easy to rinse.
Hot Water
Hot water helps loosen grease and makes cleaning easier. Use water as hot as you can safely handle.
Large Basin Or Sink
You need a basin or sink big enough to fit the exhaust fan filter. This allows the filter to soak fully.
A plastic tub or kitchen sink works well for soaking the filter in soap and water.
Scrub Brush Or Sponge
A scrub brush or sponge helps remove stuck-on grease after soaking. Choose one with firm bristles but not too harsh.
Use a non-abrasive sponge to avoid damaging the filter’s surface.
Rubber Gloves
Rubber gloves protect your hands from hot water and cleaning chemicals. They also keep your hands clean.
Towels Or Drying Rack
Use towels or a drying rack to dry the filter after cleaning. This prevents water spots and rust.
Make sure the filter is completely dry before putting it back in place.

Credit: www.youtube.com
Removing The Exhaust Fan Filter
Cleaning a greasy kitchen exhaust fan filter starts with removing it carefully. The filter catches grease and needs regular cleaning to keep the fan working well.
Knowing how to remove the filter safely makes the cleaning process easier. Follow these simple steps to take it out without damage.
Turn Off The Power
Before removing the filter, switch off the exhaust fan power. This stops the fan from turning on while you work.
Unplug the fan or turn off the circuit breaker to be safe. This protects you from electric shock or injury.
Locate The Exhaust Fan Filter
Find the filter inside the kitchen exhaust fan hood. It usually sits behind a grill or cover.
Look for clips, screws, or a latch holding the filter in place. These parts keep the filter secure.
Release The Filter
Use your hands or a screwdriver to unlock the clips or remove screws. Do this gently to avoid breaking anything.
- Press or lift clips carefully
- Turn screws counterclockwise
- Keep parts safe for reassembly
Remove The Filter Safely
Pull the filter out slowly to prevent grease from dripping. Hold it over a tray or newspaper if needed.
Place the filter on a flat surface for cleaning. Avoid touching the greasy side with bare hands.
Pre-treatment For Heavy Grease
Kitchen exhaust fan filters get covered in grease fast. Cleaning them well needs pre-treatment for heavy grease. This helps break down the thick grease before washing.
Pre-treatment makes the cleaning easier and more effective. It saves time and effort during the washing process.
Use Hot Water And Degreaser
Start by soaking the filter in hot water. Hot water helps soften the hardened grease. Add a strong degreaser or dish soap to the water.
Let the filter soak for 15 to 30 minutes. This breaks the grease down so it can rinse off easily.
Apply Baking Soda Paste
Make a thick paste with baking soda and water. Spread the paste on the greasy areas of the filter. Baking soda helps lift and dissolve grease.
Leave the paste on for 10 to 15 minutes before rinsing. This step boosts grease removal without harsh chemicals.
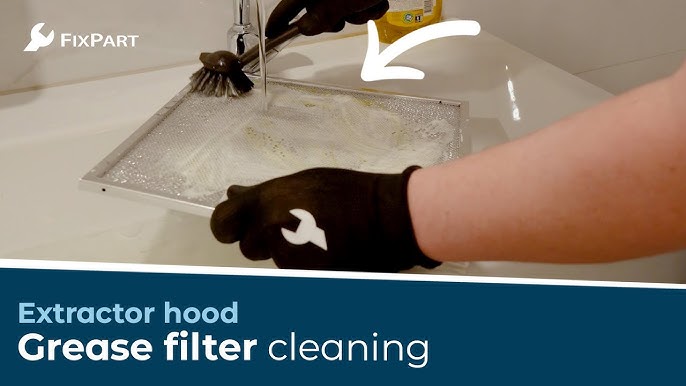
Scrub With A Soft Brush
Use a soft brush to scrub the filter gently. Scrubbing removes stuck-on grease after soaking. A brush with nylon bristles works well.
Focus on corners and mesh areas where grease hides. Avoid metal brushes to prevent damage to the filter.
Repeat Soaking If Needed
For very heavy grease, repeat soaking and scrubbing. Sometimes one pre-treatment is not enough. Multiple rounds loosen all the grime.
After pre-treatment, rinse the filter well before deep cleaning. This prepares it for the final wash.
Soaking The Filter
Cleaning a greasy kitchen exhaust fan filter is easier with soaking. This process helps loosen tough grease and dirt. It prepares the filter for a thorough wash.
Soaking uses warm water and cleaning agents to break down grime. It saves time and effort during scrubbing. Let’s explore how to soak your filter properly.
Prepare The Soaking Solution
Use hot water mixed with a degreasing cleaner or dish soap. The right solution helps cut through grease effectively. Avoid harsh chemicals that may damage the filter.
- Fill a sink or basin with hot water
- Add a few drops of dish soap or degreaser
- Stir the water to mix the cleaner evenly
Submerge And Soak The Filter
Place the filter fully into the solution. Ensure it is completely covered by the water mixture. Soak for at least 15 to 30 minutes to loosen built-up grease.
Check the filter during soaking. If grease is still hard, extend soaking time. This step softens grime for easier removal later.
Rinse And Inspect The Filter
After soaking, rinse the filter under warm running water. This removes loosened grease and soap residue. Inspect the filter for remaining dirt.
| Rinse Tips | Purpose |
| Use warm water | Helps dissolve grease |
| Rinse both sides | Ensures full cleaning |
| Shake gently | Removes trapped debris |
Scrubbing And Cleaning Techniques
Cleaning a greasy kitchen exhaust fan filter is important to keep your kitchen fresh and safe. Grease buildup can block airflow and cause odors.
This guide explains simple scrubbing and cleaning methods to remove grease effectively from your exhaust fan filter.
Preparing The Filter For Cleaning
First, remove the filter carefully from the exhaust fan. Place it in a sink or large basin to start cleaning.
- Wear rubber gloves to protect your hands.
- Use warm water to loosen the grease.
- Avoid harsh chemicals that can damage the filter.
Soaking helps soften the grease, making scrubbing easier. Use a mixture of hot water and dish soap.
- Fill a basin with hot water.
- Add a good amount of grease-cutting dish soap.
- Submerge the filter fully and let it soak for 15 to 30 minutes.
Scrubbing Methods
After soaking, scrub the filter to remove stuck grease. Use a soft brush or sponge to avoid damage.
| Tool | Best Use |
| Soft brush | Scrubbing mesh filters gently |
| Non-abrasive sponge | Cleaning flat surfaces and corners |
| Old toothbrush | Reaching small crevices |
Scrub in circular motions to lift grease. Rinse the filter often to check progress.
Rinse the filter under warm running water to remove soap and loosened grease.
- Make sure no soap residue remains.
- Shake off excess water.
- Let the filter dry completely before reinstalling.

Credit: www.searshomeservices.com
Rinsing And Drying
Cleaning a greasy kitchen exhaust fan filter needs careful rinsing and drying. These steps remove leftover grease and prepare the filter for reuse.
Proper rinsing and drying help keep your kitchen safe and your fan working well.
Rinsing The Filter
Rinse the filter with warm water to wash away soap and grease. Use a gentle stream of water to avoid damaging the filter.
Make sure to rinse both sides of the filter until water runs clear. This shows that all cleaning agents and dirt are removed.
- Use warm water, not hot, to protect the filter.
- Rinse slowly to avoid bending or breaking the mesh.
- Check for leftover grease and rinse again if needed.
Drying The Filter
Dry the filter completely before putting it back. A wet filter can attract more grease and dust quickly.
Use a clean cloth or let the filter air dry in a warm, dry place. Avoid direct sunlight as it can weaken the filter material.
- Pat dry with a soft towel to remove excess water.
- Place the filter upright to allow air flow on both sides.
- Wait until the filter is fully dry before reinstalling.
Reinstalling The Filter
After cleaning your greasy kitchen exhaust fan filter, you need to put it back properly. Correct reinstalling helps the fan work well and keeps your kitchen safe.
Follow these simple steps to reinstall the filter without any trouble. Take your time to avoid damage or poor fit.
Check The Filter Frame
Look at the filter frame for any bends or damage. A straight frame fits better and seals the exhaust fan properly. Fix or replace the frame if needed.
Align The Filter Correctly
Match the filter edges with the slots or grooves in the exhaust fan. Proper alignment makes sure air passes through the filter only and keeps the fan working efficiently.
Secure The Filter In Place
Lock the filter firmly with clips, screws, or latches. Use the right tools if needed. A loose filter can fall or allow grease to escape.
- Check clips or latches for damage before use
- Do not force the filter into place
- Tighten screws evenly to avoid bending
- Test stability by gently shaking the filter
Test The Exhaust Fan
Turn on the exhaust fan after reinstalling the filter. Listen for strange noises or air leaks. If anything seems wrong, turn it off and check the filter again.
| Common Issue | Cause | Fix |
|---|---|---|
| Filter falls out | Loose clips or latches | Secure or replace clips |
| Air leaks | Wrong alignment | Reposition filter |
| Noise during operation | Filter bent or loose | Straighten and secure filter |

Credit: www.express.co.uk
Tips To Prevent Grease Buildup
Grease buildup in kitchen exhaust fan filters can cause bad smells and fire hazards. Regular cleaning helps keep your kitchen safe and fresh.
Using some simple tips can reduce how fast grease collects on your filters. This saves you time and effort in cleaning.
Clean Filters Often
Cleaning your exhaust fan filters regularly stops grease from hardening. It is easier to clean filters before grease builds up.
- Wash filters every 1-2 weeks
- Use hot water and dish soap
- Dry filters completely before reinstalling
Use Proper Cooking Techniques
Cook food at medium heat to reduce grease splatter. Avoid cooking at very high heat, which creates more grease smoke.
Cover pans with lids to trap grease and steam. This lowers the amount of grease reaching the filter.
Use A Pre-filter Screen
A pre-filter screen catches large grease particles before they reach the main filter. This helps keep your exhaust fan cleaner.
- Install a mesh screen over the exhaust fan
- Clean the screen weekly
- Replace the screen if damaged
Maintain Good Ventilation
Keep your kitchen ventilated by opening windows or using other fans. Good airflow reduces grease buildup on filters.
Run the exhaust fan during and after cooking to clear grease particles from the air faster.
Avoid Using Excess Oil
Use only the amount of oil needed for cooking. Extra oil creates more grease smoke and buildup on the filter.
Drain fried foods on paper towels to remove oil before serving. This reduces grease in the air and on surfaces.
When To Replace Your Exhaust Fan Filter
Keeping your kitchen exhaust fan filter clean is important for safety and efficiency. Sometimes, cleaning is not enough, and you need to replace the filter.
Knowing when to replace the filter helps avoid fire risks and keeps your kitchen air fresh. This guide explains the signs that show it is time for a new filter.
Visible Damage Or Warping
Check your exhaust fan filter for any dents, cracks, or warping. Damage can reduce its ability to trap grease and allow air to pass properly.
If the filter looks bent or broken, it is best to replace it. A damaged filter can cause poor ventilation and may lead to more grease buildup.
Persistent Grease Build-up After Cleaning
Even after cleaning, some filters hold on to grease. If your filter stays greasy and does not get clean, it is time to replace it.
Old filters lose their ability to release grease during washing. Using a new filter keeps your kitchen safe from grease fires.
Frequent Cooking And Heavy Use
If you cook often or fry foods a lot, your filter will wear out faster. Heavy use means replacing the filter more often.
Filters in busy kitchens might need replacement every 3 to 6 months. Check the filter regularly and replace it if it looks very dirty.
Unpleasant Smells Or Smoke In The Kitchen
A clogged exhaust filter can cause smoke or smells to stay in the kitchen. If you notice these problems, the filter may need replacement.
Replacing the filter will help clear the air and improve your kitchen’s ventilation system.
Frequently Asked Questions
How Often Should I Clean Kitchen Exhaust Fan Filters?
Kitchen exhaust fan filters should be cleaned every 1 to 3 months. Frequent cleaning prevents grease buildup and improves air quality. Regular maintenance ensures the fan works efficiently and reduces fire risks in the kitchen.
What Is The Best Cleaning Method For Greasy Filters?
Soak the filter in hot, soapy water with degreaser for 15-30 minutes. Use a soft brush to scrub away grease. Rinse thoroughly and let it dry completely before reinstalling.
Can I Use Dishwasher To Clean Exhaust Fan Filters?
Yes, many metal filters are dishwasher-safe. Place the filter in the dishwasher’s top rack with a heavy-duty cycle. Avoid plastic filters in dishwashers as they may warp or get damaged.
What Household Items Help Remove Grease Effectively?
Baking soda, dish soap, and white vinegar work well. Combine baking soda and dish soap in hot water for soaking. Vinegar helps dissolve grease and deodorizes the filter naturally.
Conclusion
Cleaning your kitchen exhaust fan filter is essential. Grease buildup can cause problems. Regular cleaning extends the fan’s life. Follow the steps to maintain efficiency. Use warm soapy water for best results. A clean filter improves air quality. It also reduces fire risks.
Keeping your kitchen safe and fresh is easy. Just clean your filter regularly. This simple task saves time and money. Enjoy a cleaner, healthier kitchen. Remember to check your filter monthly. Don’t let grease buildup overwhelm you. Stay proactive. Keep your kitchen environment pleasant and safe.
Happy cleaning!


