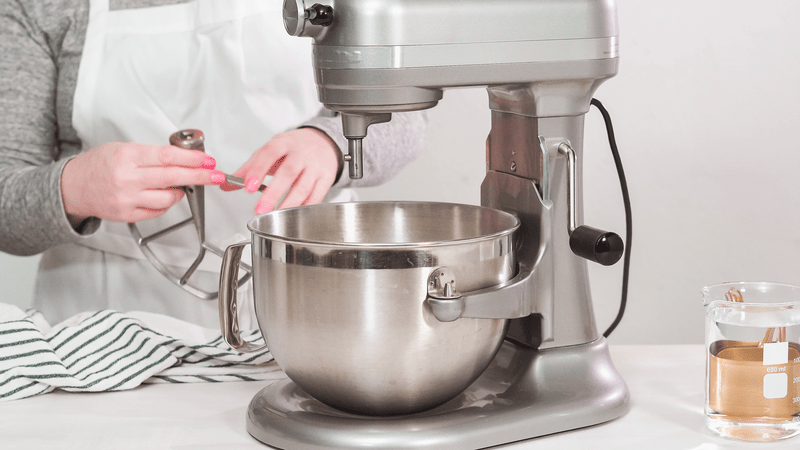
Your KitchenAid stand mixer is a game-changer in the kitchen, making everything from mixing dough to whipping cream a breeze. But when it comes to cleaning those attachments, things can get a bit tricky.
If you’ve ever wondered how to keep your mixer attachments sparkling clean without damaging them, you’re in the right place. In this guide, you’ll discover simple, effective steps to clean your KitchenAid stand mixer attachments effortlessly. Imagine the satisfaction of knowing each attachment is spotless and ready for your next culinary masterpiece.
Don’t let dirt and grime hold you back; dive into this guide to ensure your mixer is always in top shape!
Credit: www.homeserve.com
Tools Needed
Cleaning your KitchenAid stand mixer attachments keeps them working well. Using the right tools makes the job easier and faster.
Below are the key supplies to have on hand for regular cleaning and for tougher stains.
Essential Cleaning Supplies
These items help remove everyday food residue and keep attachments in good shape.
- Mild dish soap
- Warm water
- Soft sponge or cloth
- Small brush for crevices
- Dry towel or microfiber cloth
Optional Items For Tough Stains
Use these tools if food is stuck or if there is grease buildup on your attachments.
| Tool | Purpose |
| Baking soda | Acts as a gentle abrasive to remove stuck-on food |
| White vinegar | Breaks down grease and helps disinfect |
| Toothbrush | Reaches small crevices for detailed cleaning |
| Plastic scraper | Safely lifts hardened food without scratching |
Credit: thekrazycouponlady.com
Detaching The Attachments
Cleaning your KitchenAid stand mixer attachments starts with safely removing them. Proper detachment prevents damage and keeps the parts in good shape.
Different attachments need different handling methods. Knowing how to remove each one helps you clean effectively without risk.
Removing Safely
Always turn off and unplug the mixer before detaching any parts. This avoids accidents and electric shocks.
- Lift the mixer head to access the attachment.
- Hold the attachment firmly and twist it to unlock.
- Pull the attachment straight down to remove it.
- Do not force the attachment if it feels stuck.
- Wipe the attachment with a damp cloth before cleaning.
Handling Different Attachments
| Attachment | How to Detach | Cleaning Tip |
| Flat Beater | Twist and pull down gently | Soak in warm, soapy water |
| Wire Whip | Twist carefully to avoid bending wires | Use a brush to clean between wires |
| Dough Hook | Turn counterclockwise and pull down | Wipe with a damp cloth |
| Pouring Shield | Lift straight up from the bowl | Wash with mild soap |
Handle each attachment with care. Avoid bending or dropping them to keep them working well.
Hand Washing Attachments
Cleaning your KitchenAid stand mixer attachments by hand keeps them in good shape. It helps remove food stuck in small parts.
Hand washing is gentle and stops damage from harsh dishwasher cycles. Use warm water and mild soap for the best results.
Soaking Techniques
Soaking helps loosen dried food and grease on your attachments. Use warm, soapy water for the best effect.
Fill a bowl or sink with warm water and add a few drops of mild dish soap. Let the attachments soak for 10 to 15 minutes.
- Use warm, not hot, water to protect the finish
- Soak only for a short time to avoid damage
- Check attachments to see if food loosens before scrubbing
Scrubbing Tips
Use a soft brush or sponge to clean your attachments after soaking. Avoid metal scrubbers that can scratch the surface.
Focus on corners and crevices where food tends to hide. Rinse well with warm water to remove soap and debris.
- Use a soft-bristled brush for tough spots
- Gently scrub without applying too much pressure
- Dry attachments with a clean towel to prevent rust
Dishwasher Cleaning
Cleaning your KitchenAid stand mixer attachments in the dishwasher saves time. It keeps them hygienic and ready to use.
Not all attachments can go in the dishwasher. Knowing which ones are safe is important to avoid damage.
Which Attachments Are Dishwasher Safe
Many KitchenAid attachments are dishwasher safe. The safest parts usually have no motors or sensitive parts.
- The flat beater, wire whip, and dough hook are usually safe.
- Attachments made from stainless steel or coated metal work well.
- Plastic parts labeled dishwasher safe can go in the dishwasher.
- Do not put electrical or motorized attachments in the dishwasher.
Always check your user manual to confirm if your attachment is dishwasher safe.
Proper Placement In Dishwasher
Place attachments on the top rack of the dishwasher. This keeps them away from heating elements.
Secure small parts so they do not move during the wash cycle. Avoid crowding to allow water flow.
- Use the top rack to avoid heat damage.
- Place small parts in a dishwasher basket or secure area.
- Keep attachments separate from heavy pots and pans.
- Use a gentle cycle to protect finishes.
Removing Stubborn Residue
Stubborn residue on KitchenAid stand mixer attachments can be hard to remove. It often builds up after mixing thick or sticky ingredients.
Cleaning these attachments properly helps keep them in good shape and ready to use for your next recipe.
Using Baking Soda And Vinegar
Baking soda and vinegar create a natural cleaner that breaks down tough residue. This method is safe and effective for metal and plastic attachments.
- Sprinkle baking soda over the attachment surface.
- Pour a small amount of white vinegar on top.
- Let the mixture bubble and sit for 10 minutes.
- Use a soft brush or cloth to scrub the residue gently.
- Rinse thoroughly with warm water to remove all cleaning agents.
- Dry the attachment completely before storage.
Alternative Cleaning Solutions
Some attachments need stronger or different cleaning methods. Choose a solution based on the residue type and attachment material.
| Cleaning Solution | Best For | How to Use |
| Dish Soap and Warm Water | General cleaning | Soak and scrub with a sponge. |
| Lemon Juice | Removing grease and odors | Apply lemon juice, let sit 5 minutes, rinse. |
| Rubbing Alcohol | Sticky or oily residue | Wipe with a cloth soaked in alcohol, then rinse. |
| Commercial Degreaser | Heavy buildup | Follow product instructions carefully, rinse well. |
Credit: cleanzen.com
Drying And Storing Attachments
Cleaning your Kitchenaid stand mixer attachments is important. Drying and storing them correctly keeps them safe and ready to use.
Proper care prevents rust and damage. It also helps your attachments last longer.
Best Drying Practices
After washing, dry attachments right away. Water left on metal parts can cause rust. Use a soft towel to remove water.
Air drying is good but place attachments where air moves freely. Avoid damp or closed spaces to stop moisture build-up.
- Wipe attachments with a clean, dry cloth
- Let them air dry in a well-ventilated area
- Avoid stacking wet attachments together
- Check for any water trapped in hard-to-reach spots
Storage Tips To Prevent Damage
Store attachments in a dry, cool place. Keep them away from humidity and heat. This prevents rust and warping.
Use storage containers or bags to protect attachments from dust. Keep different attachments separate to avoid scratches.
- Use original boxes or plastic containers
- Wrap attachments in soft cloth or paper towels
- Store attachments upright or flat without stacking heavy items on top
- Keep them in a cabinet or drawer with good airflow
Maintaining Your Mixer Attachments
Keeping your KitchenAid stand mixer attachments clean helps them last longer. Dirt and food build-up can affect how well they work.
Regular care ensures your mixer stays safe and ready for every recipe. Follow simple cleaning tips to maintain your attachments.
Regular Cleaning Schedule
Clean your attachments after every use to prevent food residue from hardening. This keeps them hygienic and prevents rust.
- Detach the attachment from the mixer.
- Wash with warm, soapy water using a soft sponge.
- Rinse thoroughly with clean water.
- Dry completely with a towel or air dry before storing.
- Use a brush to clean small crevices and holes.
Avoiding Common Mistakes
Some cleaning habits can damage your attachments. Avoid these mistakes to keep them working well.
| Common Mistake | Why to Avoid | Tip |
| Soaking metal parts too long | May cause rust | Wash quickly and dry fast |
| Using abrasive sponges | Can scratch surfaces | Use soft cloth or sponge |
| Putting attachments in dishwasher | Heat may damage finish | Hand wash only unless stated safe |
| Ignoring food in small holes | Leads to bacteria build-up | Clean with a small brush |
Frequently Asked Questions
How Do I Clean Kitchenaid Mixer Attachments Safely?
To clean Kitchenaid attachments, detach them first. Wash with warm, soapy water using a soft cloth. Avoid abrasive scrubbers to protect finishes. Dry thoroughly before storage to prevent rust and damage.
Can I Put Kitchenaid Attachments In The Dishwasher?
Most Kitchenaid attachments are dishwasher safe on the top rack. Check the manufacturer’s guidelines for specific models. Hand washing is recommended for delicate or coated attachments to extend their lifespan.
How Often Should I Clean Kitchenaid Stand Mixer Attachments?
Clean attachments after every use to avoid food buildup. Regular cleaning maintains hygiene and ensures smooth operation. Prompt washing prevents stains and prolongs attachment durability.
What Is The Best Way To Remove Stubborn Residue?
Soak attachments in warm, soapy water for 10-15 minutes. Use a soft brush to gently scrub away residue. Avoid harsh chemicals that can damage the attachment surface.
Conclusion
Cleaning your KitchenAid stand mixer attachments keeps them working well. Regular care stops buildup and keeps your food safe. Use warm water and mild soap for best results. Dry each part fully to avoid rust or damage. Clean attachments after every use for easier maintenance.
A clean mixer helps you bake and cook with ease. Simple steps make a big difference in your kitchen routine. Keep your tools ready for the next recipe adventure.