
Are you looking to give your Ikea kitchen a fresh new look without spending a fortune? Changing your Ikea kitchen drawer fronts is a simple yet effective way to transform your space.
Imagine walking into your kitchen and feeling that sense of satisfaction from an updated, stylish environment. You might think it’s a daunting task, but with the right guidance, it can be easier than you imagine. In this guide, we’ll show you how to change those drawer fronts step-by-step, ensuring you achieve a sleek, modern look effortlessly.
Don’t let the fear of DIY hold you back from having the kitchen of your dreams. Let’s dive in and get started on making your kitchen a place you love!
Preparing For The Project
Changing Ikea kitchen drawer fronts can refresh your kitchen’s look. Preparing well makes the process smooth and easy.
Before you start, gather tools, pick new fronts, and measure your drawers carefully.
Gathering Necessary Tools
Having the right tools helps you work faster and avoid damage. Check your tool kit before you begin.
- Screwdriver (Phillips and flathead)
- Measuring tape
- Drill with bits
- Level
- Clamps
- Wood glue (optional)
- Soft cloth for cleaning
Choosing New Drawer Fronts
Select drawer fronts that match your kitchen style and fit Ikea cabinets. Consider color, material, and design.
| Material | Pros | Cons |
| Wood | Durable, classic look | Needs maintenance |
| MDF | Smooth surface, easy to paint | Less durable |
| Laminate | Easy to clean, many colors | Can chip |
| Glass | Modern, brightens space | Fragile |
Measuring Your Drawers
Measure your drawer fronts carefully to order the right size. Accurate measurements avoid fitting problems later.
- Remove the drawer from the cabinet.
- Measure width from left to right.
- Measure height from top to bottom.
- Note the thickness of the front panel.
- Record all measurements clearly.

Credit: www.reddit.com
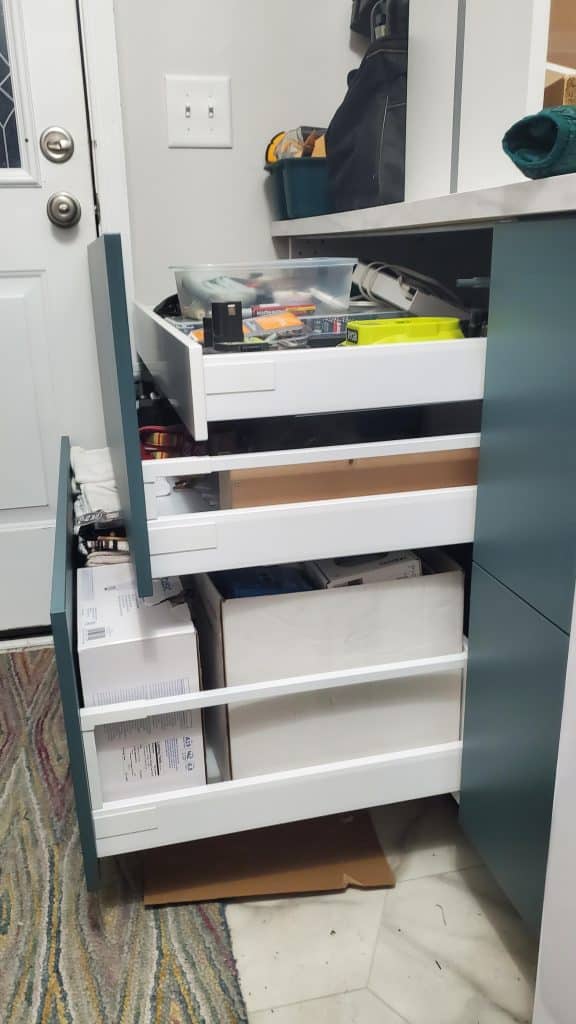
Removing Old Drawer Fronts
Changing your Ikea kitchen drawer fronts starts with removing the old ones safely. This process helps prepare for new fronts to fit well and look great.
Take time to follow the steps carefully. This prevents damage to the drawers and makes installation easier later.
Emptying Drawers
Before removing drawer fronts, remove everything inside. Empty drawers are lighter and easier to handle.
- Take out all dishes, utensils, or food items.
- Remove any liners or mats inside the drawers.
- Check for small objects that might fall out during removal.
Unscrewing Existing Fronts
Most Ikea drawer fronts attach with screws from the inside. Use the right screwdriver to avoid stripping the screws.
- Open the drawer fully to access the screws.
- Locate the screws on the inside of the drawer front.
- Turn each screw counterclockwise to loosen and remove them.
- Keep screws in a safe place if you plan to reuse them.
- Gently pull the drawer front away from the drawer box.
Handling Common Issues
Sometimes problems arise during removal. Use this table to find solutions to common issues.
| Issue | Cause | Solution |
|---|---|---|
| Stuck drawer front | Paint or glue residue | Use a putty knife to gently loosen edges |
| Stripped screws | Wrong screwdriver size | Use a screw extractor or rubber band for grip |
| Drawer front cracks | Excessive force | Apply slow, steady pressure and avoid prying |
Installing New Drawer Fronts
Replacing Ikea kitchen drawer fronts can refresh your kitchen’s look. Installing new fronts is simple with the right steps.
This guide covers how to align, secure, and adjust your new drawer fronts for the best fit.
Aligning The New Fronts
Start by placing the new drawer fronts on the drawer boxes. Check that the edges line up evenly with the cabinet frame.
- Hold the front flush against the drawer box.
- Make small adjustments to center the front horizontally.
- Ensure the top and bottom edges are level.
- Check spacing between drawer fronts for uniform gaps.
Securing With Screws
Use screws to attach the new fronts to the drawer boxes. Ikea drawers usually have pre-drilled holes for easy installation.
| Tool | Purpose | Tip |
|---|---|---|
| Electric screwdriver | Drive screws quickly | Use low torque to avoid damage |
| Wood screws | Attach fronts securely | Use the screws provided with fronts |
| Level | Check alignment | Place on top edge of drawer front |
Adjusting For Perfect Fit
After securing the fronts, adjust them to ensure smooth drawer operation. Small tweaks can improve the overall look and function.
- Loosen screws slightly if the front is uneven.
- Shift the front gently to correct position.
- Tighten screws once aligned properly.
- Open and close drawers to check for rubbing or gaps.
- Make minor adjustments as needed for smooth use.

Credit: www.reddit.com
Finishing Touches
After changing your Ikea kitchen drawer fronts, the final steps make a big difference. These finishing touches improve the look and function of your drawers.
Focus on adding handles or knobs, cleaning and inspecting the drawers, and maintaining them for long-lasting use.
Adding Handles Or Knobs
Choose handles or knobs that match your kitchen style. Attach them securely to the new drawer fronts. Use the same holes if they match, or drill new ones carefully.
- Pick the right size and style
- Align handles evenly on each drawer front
- Use a drill guide to avoid mistakes
- Tighten screws firmly but do not over-tighten
Cleaning And Inspecting
Clean your drawer fronts and inside drawers after installation. Check for any damage or loose parts. Fix problems before they get worse.
| Task | What to Do | Tools Needed |
|---|---|---|
| Clean fronts | Use mild soap and soft cloth | Soap, cloth |
| Check hinges | Look for loose screws or cracks | Screwdriver, flashlight |
| Inspect drawer slides | Test smooth opening and closing | None |
Maintaining Your Drawers
Keep your drawers working well with regular care. Lubricate slides and tighten screws. Avoid overloading drawers to prevent damage.
- Lubricate metal or plastic slides every six months
- Tighten all screws and handles regularly
- Wipe surfaces to remove dirt and dust
- Do not store heavy items beyond drawer limits
Troubleshooting Tips
Changing Ikea kitchen drawer fronts can be simple, but some problems may occur. These tips help you fix common issues fast.
Check these solutions before calling for help. You might save time and effort with these easy fixes.
Fixing Misalignment
Drawer fronts can look uneven if they are not aligned correctly. This affects both how they look and work.
To fix this, loosen the screws holding the front slightly. Move the drawer front until it lines up well. Then tighten the screws again.
- Use a level tool to check straightness
- Adjust the front side to side or up and down
- Tighten screws only after the drawer front fits well
- Check if the drawer slides open and close smoothly
Dealing With Damaged Hardware
Sometimes screws, hinges, or brackets get damaged or worn out. This can stop your drawer from working right.
First, remove any broken parts carefully. Match replacements with the original hardware from Ikea or a hardware store.
- Check if screws are stripped or bent
- Replace hinges if they are loose or broken
- Use the same size and type of screws for replacements
- Keep old parts for reference when buying new ones
When To Seek Professional Help
Some problems need expert skills. If you cannot fix the drawer front after trying, get help.
Call a carpenter or Ikea service if the drawer frame is damaged or the problem is complex. They have tools and experience for tricky fixes.
- If the drawer does not fit after many adjustments
- When hardware pieces are missing and hard to find
- If the drawer frame is cracked or broken
- When you feel unsure about fixing it safely

Credit: www.youtube.com
Frequently Asked Questions
How Do I Remove Ikea Kitchen Drawer Fronts?
To remove Ikea kitchen drawer fronts, start by opening the drawer fully. Locate and unscrew the mounting brackets inside. Gently pull the drawer front away from the drawer box. Be careful not to damage the clips or screws for easy reattachment.
Can I Use Non-ikea Fronts On Ikea Drawers?
Yes, you can use non-Ikea fronts on Ikea drawers if the dimensions match. Ensure screw holes align or can be adjusted. Custom fronts may require drilling new holes for mounting. This allows for personalized style while keeping Ikea drawer boxes.
What Tools Are Needed To Change Drawer Fronts?
You will need a screwdriver, drill, and possibly a tape measure. A level helps ensure the front is straight. Soft cloth protects surfaces during removal and installation. Having all tools ready speeds up the process and avoids damage.
How Long Does It Take To Replace Drawer Fronts?
Replacing Ikea kitchen drawer fronts typically takes 30 to 60 minutes. Time depends on drawer quantity and complexity. Careful removal and precise alignment ensure the best results. Patience during installation improves durability and appearance.
Conclusion
Changing Ikea kitchen drawer fronts can refresh your kitchen’s look quickly. The process is simple and requires only a few tools. Taking your time helps avoid mistakes and saves effort later. Choose drawer fronts that match your style and kitchen design well.
This small update can make a big difference in your space. Enjoy the new feel of your kitchen without a full renovation. Now, your kitchen looks fresh and fits your taste perfectly. Try this easy project and see the change for yourself.


