How to Bake Sourdough After Cold Proof? Imagine the smell of freshly baked sourdough bread wafting through your kitchen. It's a comforting scent that promises a delicious, crispy crust and a tender crumb inside.
But how do you get there, especially after your dough has been chilling in the fridge overnight? If you've ever wondered how to bake sourdough after a cold proof, you're in the right place. You might think it's a daunting task, but with a few simple steps, you'll be enjoying your homemade sourdough in no time.
This guide is designed to take you through the process, ensuring your bread turns out just the way you want it. So, let's dive in and transform that cold dough into a warm, inviting loaf. Your senses—and your taste buds—are in for a treat!
Preparing Dough After Cold Proof
After cold proofing your sourdough, the dough needs careful handling before baking. This stage sets the final texture and shape.
Proper timing, shaping, and using the right tools will improve your bread's rise and crust.
Timing The Dough For Baking
Take the dough out of the fridge and let it rest at room temperature. This lets the yeast wake up and the dough warm up.
- Remove dough from fridge and place in a bowl.
- Cover the dough with a damp cloth or plastic wrap.
- Let it sit for 1 to 2 hours until it feels soft and slightly puffy.
- Check the dough by gently pressing it; it should slowly bounce back.
Handling And Shaping Techniques
Handle the dough gently to keep air inside. Proper shaping builds tension on the dough surface for a good rise.
- Lightly flour your hands and work surface.
- Turn the dough out onto the floured surface.
- Fold the dough edges towards the center to create tension.
- Use your hands to shape the dough into a tight ball or oval.
- Place the shaped dough seam-side up in a proofing basket or bowl.
Using Flour And Bench Tools
Using the right flour and tools helps prevent sticking and shapes the dough well.
| Tool | Purpose | Tip |
| Banneton or Proofing Basket | Supports dough shape during final rise | Line with a well-floured cloth to prevent sticking |
| Dutch Oven or Baking Stone | Ensures even heat and crust development | Preheat before baking |
| Bread Lame or Sharp Knife | Scores dough to control expansion | Make quick, confident cuts |
| Bench Scraper | Helps lift and fold dough without tearing | Keep it handy for shaping |

Credit: www.reddit.com
Oven Setup For Sourdough
Setting up your oven properly is key to baking great sourdough. The right tools and temperature help the bread rise and form a crisp crust.
This guide covers choosing bakeware, preheating, and how to create steam in your oven for perfect sourdough.
Choosing The Right Bakeware
Pick bakeware that holds heat well and can handle high temperatures. This helps your sourdough bake evenly and develop a good crust.
- Ceramic or cast iron Dutch ovens trap heat and steam.
- Heavy baking stones or steel sheets provide even heat from below.
- A rimmed baking sheet works if you don’t have other options.
- A lid or cover helps keep steam close to the dough.
Preheating And Temperature Settings
Preheat your oven well before baking. A hot oven gives your dough a strong rise and crust.
| Oven Temperature | Recommended Bakeware | Preheat Time |
| 450°F (230°C) | Dutch oven, baking stone | 30-45 minutes |
| 425°F (220°C) | Rimmed baking sheet | 20-30 minutes |
Place your bakeware in the oven while it preheats. This ensures it reaches the right temperature before you put in your dough.
Creating Steam In The Oven
Steam helps your sourdough crust stay soft at first, allowing the bread to expand. It also creates a shiny, crispy crust.
- Place a metal pan on the bottom rack during preheat.
- Right after placing the dough, pour hot water into the pan.
- Spray water on the oven walls with a spray bottle before closing.
- Use a covered Dutch oven to trap steam naturally.
- Remove the steam source halfway through baking to crisp the crust.
Baking Process Tips
Baking sourdough after cold proof needs care and attention. The cold proof helps develop flavor and texture.
Follow key tips to get the best oven spring and crust. This guide covers scoring, crust monitoring, and bake adjustments.
Scoring For Expansion And Aesthetics
Scoring means cutting shallow lines on dough before baking. It helps the bread expand without cracking.
Good scoring creates attractive patterns and guides dough growth in the oven.
- Use a sharp blade or lame for clean cuts
- Make quick, confident slashes about 1/4 inch deep
- Cut at an angle to encourage upward rise
- Try simple patterns like a single slash or cross
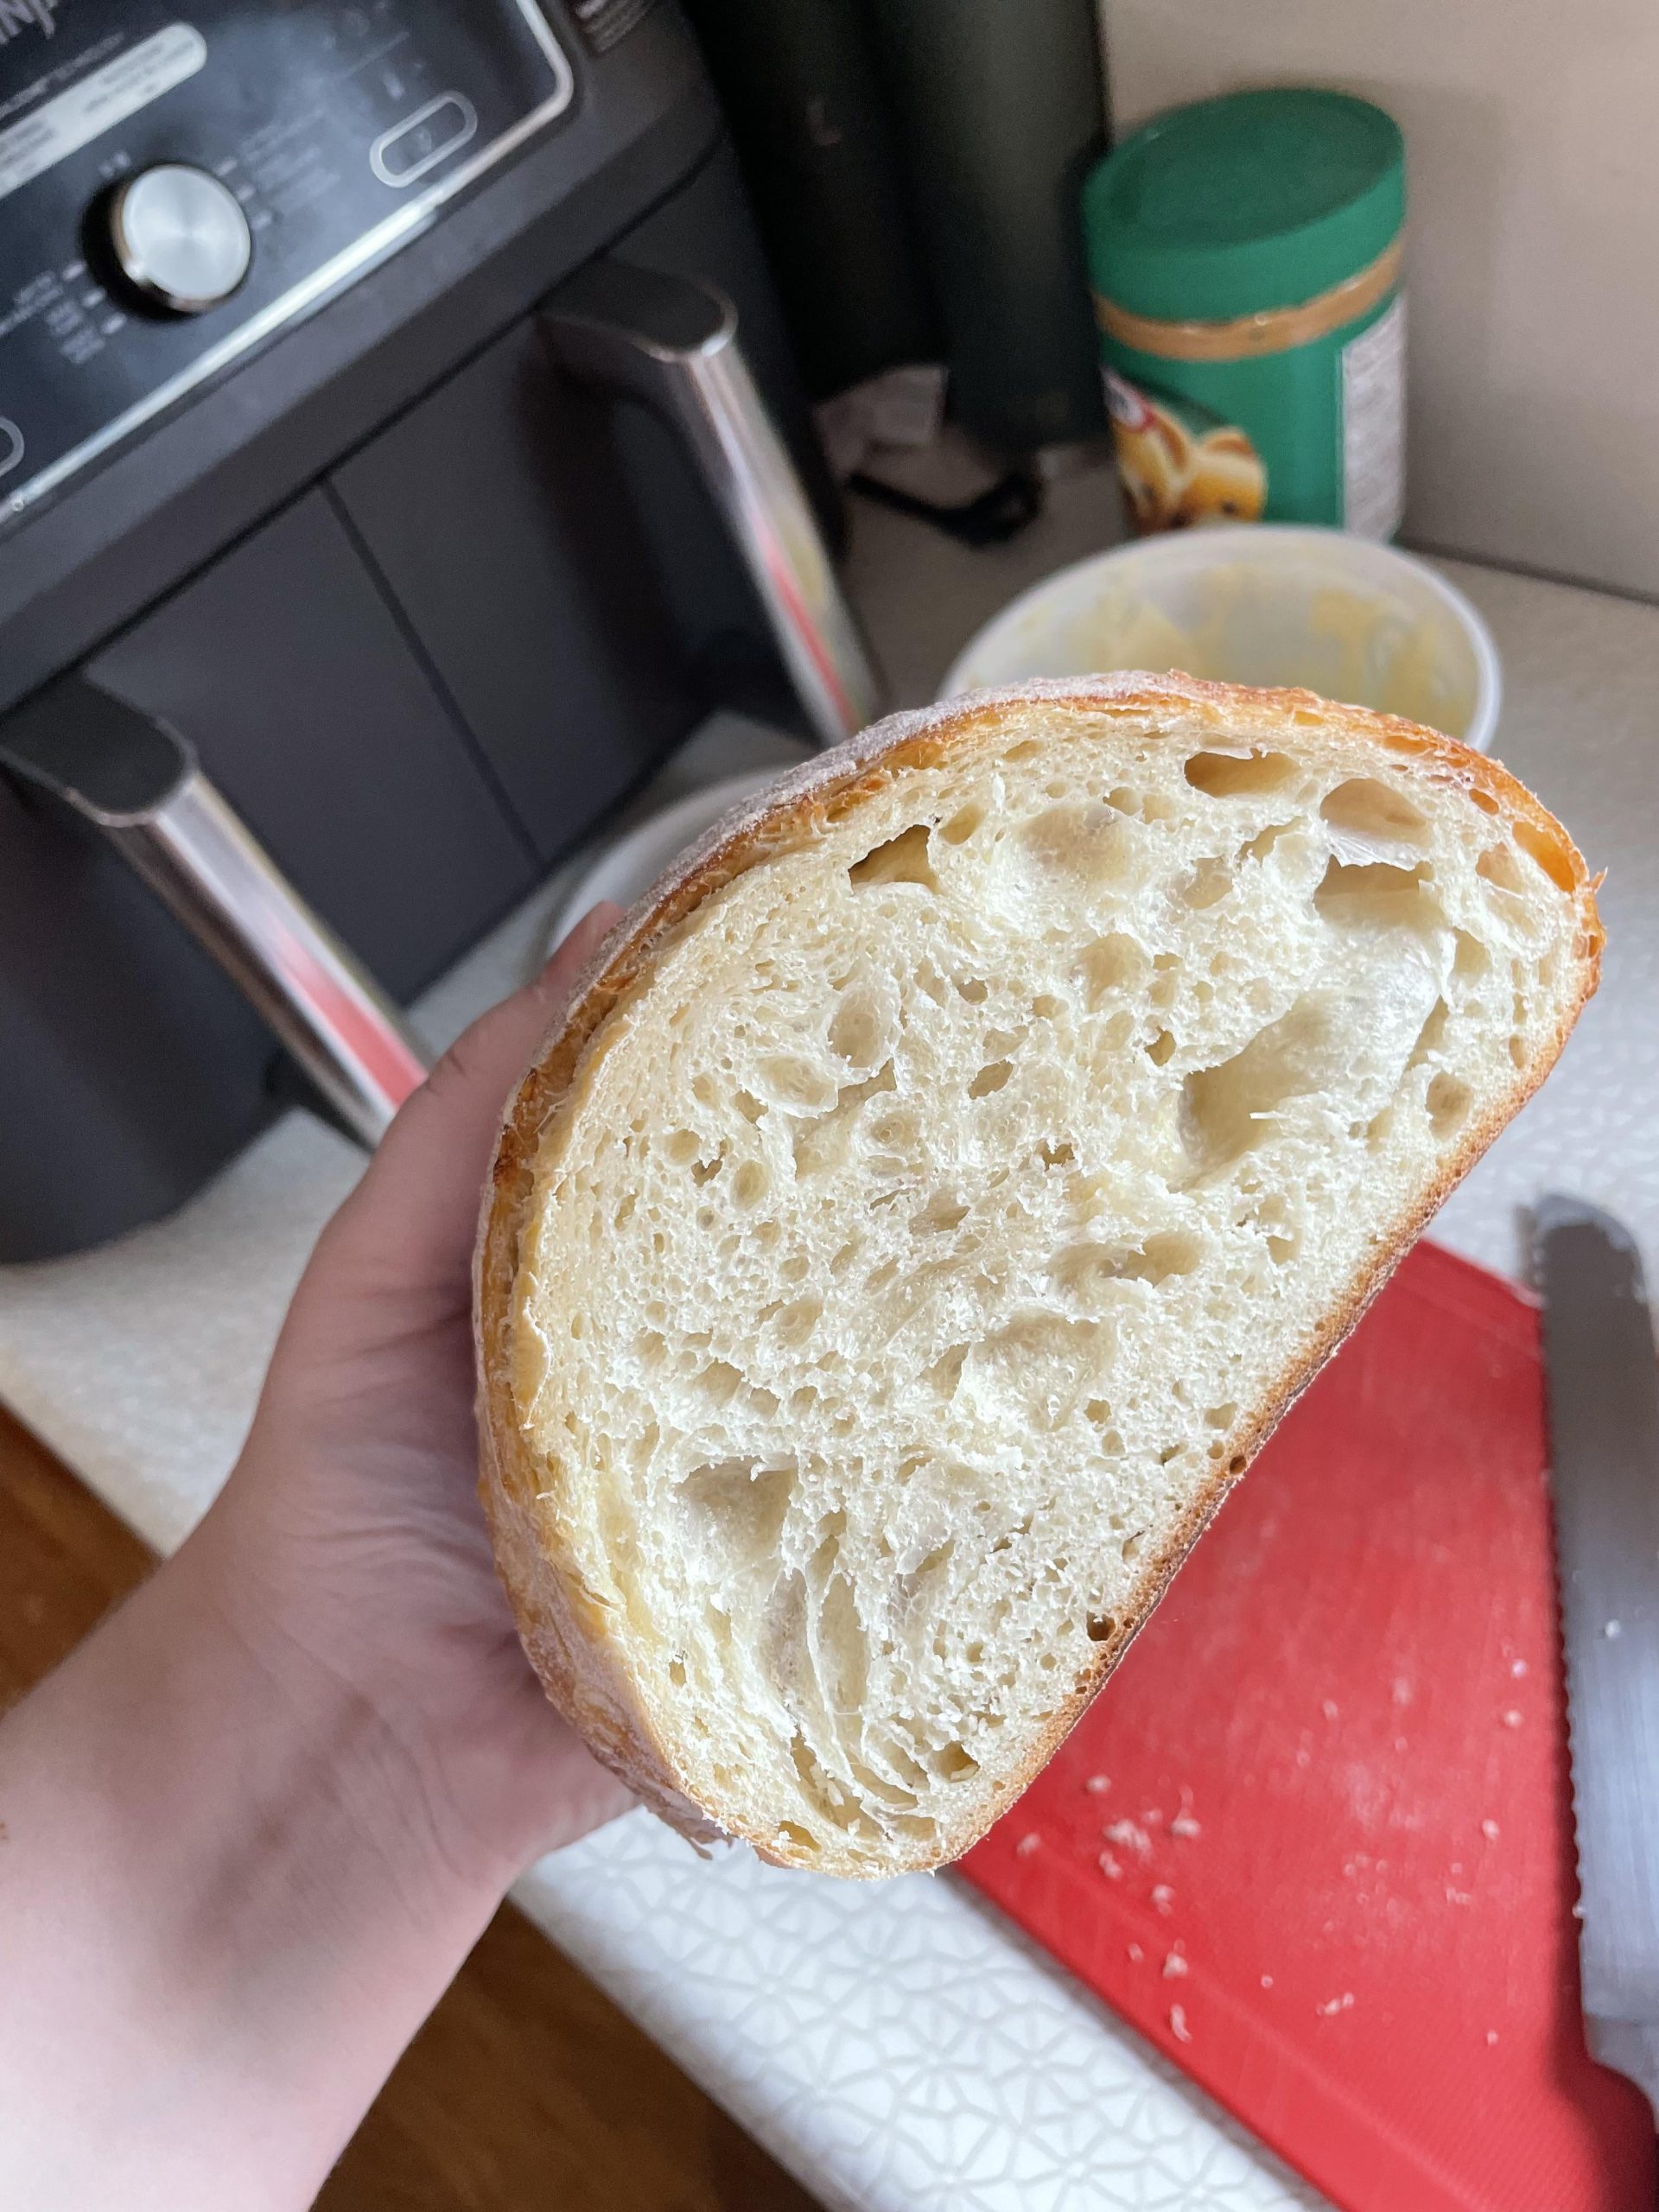
Monitoring Crust Development
Watch the crust color to avoid burning or underbaking. The crust should be golden brown and firm.
Use your oven light to check the crust without opening the door too often.
- Early crust is pale and soft
- Mid-bake crust turns golden and starts to harden
- Final crust is deep brown and crisp
- Adjust steam to control crust texture
Adjusting Bake Time And Temperature
Bake time and temperature can change based on dough size and oven type. Adjust to get the best results.
Lower temperature and longer time help bake larger loaves evenly. Higher heat creates a crisp crust quickly.
- Start with 450°F (230°C) for steam and rise
- Reduce to 400°F (205°C) after 15 minutes for even baking
- Bake smaller loaves 30-35 minutes, larger loaves 40-50 minutes
- Use an instant-read thermometer; 200°F (93°C) inside means done

Credit: www.reddit.com
Secrets To Achieve Perfect Crust
Baking sourdough after cold proof needs care to get a great crust. The crust is what makes sourdough special and tasty.
Using the right techniques helps create a crust that is crisp and full of flavor. Small details make a big difference.
Steam's Role In Crust Formation
Steam keeps the dough surface wet during the first baking minutes. This helps the crust grow and stay thin.
Without steam, the crust hardens too fast and stops rising. Steam also helps create a shiny and crackly crust.
- Use a pan with water in the oven to add steam.
- Spray water on the dough before baking.
- Bake inside a covered Dutch oven to trap steam.
Cooling Techniques For Crunchiness
Cooling the bread properly helps the crust become crunchy and stay that way. Heat inside the loaf finishes baking as it cools.
Place the bread on a wire rack to let air flow all around. Avoid wrapping the bread while it is still warm.
- Cool bread at room temperature on a wire rack.
- Do not cover bread until fully cooled.
- Wait at least one hour before slicing.
Common Mistakes To Avoid
Many bakers rush or skip steps that help create a good crust. These mistakes affect the final texture and taste.
Watch out for these errors to get better results with your sourdough baking.
- Baking without steam in the first 15 minutes.
- Cutting the bread before it cools down fully.
- Using oven temperature that is too low or too high.
- Not scoring the dough to let it expand properly.
Storing And Serving
After baking sourdough from cold proof, storing it right keeps it fresh longer. Serving it properly brings out the best taste and texture.
Learn easy ways to keep your sourdough crust crisp and your bread soft inside. Follow these tips to enjoy your bread at its best.
Maintaining Crust Freshness
The crust of sourdough can lose its crunch if not handled well. Keep your bread crispy by storing and serving it carefully.
- Cool the bread completely before storing to avoid moisture build-up.
- Wrap the loaf in a clean kitchen towel or paper bag to allow airflow.
- Avoid plastic bags for long storage; they trap moisture and soften the crust.
- Reheat the bread in a hot oven for 5-10 minutes before serving to refresh the crust.
Best Practices For Sourdough Storage
Proper storage keeps sourdough fresh and tasty. Use these methods depending on how long you plan to keep the bread.
| Storage Method | Duration | Instructions |
|---|---|---|
| Room Temperature | Up to 2 days | Wrap in a kitchen towel and keep in a bread box or paper bag. |
| Refrigeration | Up to 1 week | Wrap in foil or place in a plastic bag to reduce dryness. |
| Freezing | Up to 3 months | Slice before freezing. Wrap tightly in plastic wrap and foil. |

Credit: www.reddit.com
Frequently Asked Questions
How Long Should Sourdough Bake After Cold Proof?
Bake sourdough at 450°F (232°C) for 30 to 40 minutes. Use a Dutch oven or baking stone for even heat. The crust should be golden brown and crisp. Internal temperature should reach 205°F (96°C) for perfect doneness.
Should I Score Sourdough Before Baking After Cold Proof?
Yes, scoring allows steam to escape and controls expansion. It creates beautiful patterns and prevents tearing. Use a sharp blade or lame for clean cuts. Score just before placing the dough in the oven.
Do I Need To Preheat The Oven For Baking Sourdough?
Always preheat your oven and baking vessel for at least 30 minutes. This ensures even heat and a strong oven spring. A hot environment helps form a crisp crust and proper rise after cold proof.
Can I Bake Sourdough Straight From The Fridge?
Yes, bake cold proofed sourdough directly from the fridge. Cold dough handles better and retains shape during baking. No need to warm it up; just score and place in a preheated oven immediately.
Conclusion
Baking sourdough after cold proof takes patience and care. The dough is ready when it feels soft and slightly springy. Preheat your oven and use a Dutch oven or baking stone for best results. Scoring the dough helps it expand and creates a nice crust.
Baking time depends on your oven but usually takes 30 to 45 minutes. Let the bread cool before slicing to keep its texture. Enjoy the rich flavor and chewy crumb that cold proofing brings. Practice makes perfect, so keep baking and learning.