
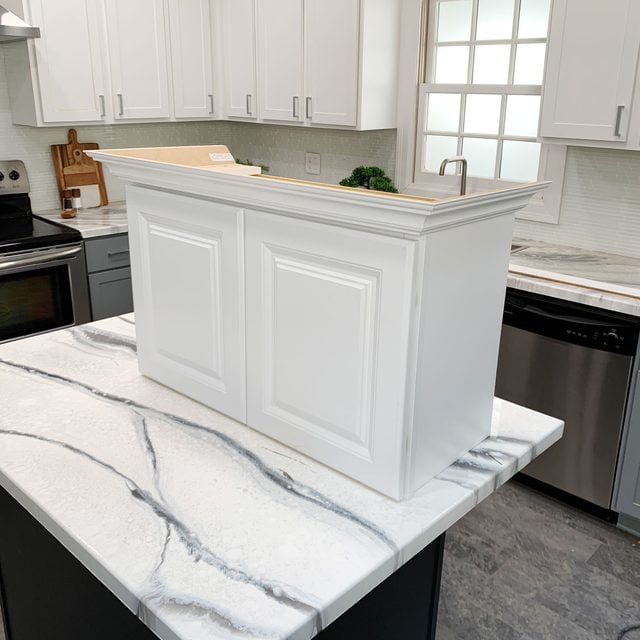
Are you tired of your kitchen’s outdated look? How to Add Moulding to Kitchen Cabinets might be the perfect solution to breathe new life into your space without breaking the bank.
Imagine walking into your kitchen and being greeted by a touch of elegance that you created yourself. Moulding can transform plain cabinets into stunning focal points, adding depth and character that makes your kitchen feel fresh and inviting. You don’t need to be a professional carpenter to achieve this transformation.
With a few tools and some guidance, you can enhance your kitchen’s aesthetic and even increase your home’s value. Ready to discover how you can easily add moulding to your kitchen cabinets? Stick around, and let’s unlock the secret to giving your kitchen that wow factor it deserves.

Credit: www.angi.com
Choosing The Right Moulding
Adding moulding to kitchen cabinets can improve their look. It adds style and finishes the edges nicely.
Choosing the right moulding means picking the style, material, and size that fit your kitchen.
Types Of Moulding For Cabinets
Moulding comes in many shapes and styles. The right type depends on your kitchen design and cabinet style.
- Crown Moulding: Adds a decorative top edge to cabinets.
- Base Moulding: Covers the gap between cabinets and floor.
- Fluted Moulding: Features vertical grooves for texture.
- Beaded Moulding: Has small rounded beads for detail.
- Rosettes: Decorative corner blocks used with crown moulding.
Selecting Materials And Finishes
Choose materials that match your cabinets and kitchen style. Wood is popular for its natural look.
Finishes like paint or stain should blend with or complement your cabinet colors.
- Wood: Easy to paint or stain, classic choice.
- MDF: Smooth surface, good for painted finishes.
- Polyurethane: Durable and resists moisture.
- PVC: Water-resistant and low maintenance.
Measuring For Accurate Cuts
Measure your cabinets carefully before cutting moulding. Accurate cuts ensure a clean fit.
Use a tape measure and mark each piece. Measure corners twice to avoid mistakes.
- Measure the length of each cabinet edge.
- Mark angles for corners, usually 45 degrees.
- Double-check measurements before cutting.
- Cut slowly and use proper tools for clean edges.
Credit: www.familyhandyman.com
Tools And Supplies Needed
Adding moulding to kitchen cabinets can improve their look. You need the right tools and supplies to do the job well. This guide covers what you will need.
Getting prepared with the correct tools and safety gear makes the process easier and safer. Let’s look at the essentials.
Essential Tools List
- Miter saw – to cut moulding at angles
- Measuring tape – for accurate measurements
- Level – to ensure straight placement
- Hammer and nails or nail gun – to attach moulding
- Wood glue – for added hold
- Sandpaper – to smooth edges and surfaces
- Stud finder – to locate secure nailing spots
- Pencil – to mark cutting and placement lines
Safety Gear Recommendations
| Safety Item | Purpose |
| Safety glasses | Protect eyes from dust and debris |
| Work gloves | Protect hands from splinters and cuts |
| Ear protection | Reduce noise from power tools |
| Dust mask | Prevent inhaling sawdust |
Always wear safety gear when cutting or nailing moulding. This keeps you safe and makes the task more comfortable.
Preparing Cabinets For Moulding
Adding moulding to kitchen cabinets can improve their look. Proper preparation helps the moulding stick well and last longer.
Start by making sure the cabinet surfaces are clean and smooth. Remove anything that could get in the way before attaching the moulding.
Cleaning And Sanding Surfaces
Clean the cabinet surfaces to remove grease and dirt. Use a mild cleaner and a soft cloth. Let the surfaces dry completely before sanding.
Sand the surfaces lightly with fine-grit sandpaper. This will help the moulding glue or paint stick better. Wipe off dust with a damp cloth.
Removing Old Hardware
Remove knobs, handles, and hinges from the cabinets. This prevents damage and makes it easier to attach moulding evenly.
- Use a screwdriver to remove screws gently.
- Keep all hardware pieces in a safe place for reuse.
- Check for any loose screws or damaged areas.
- Fill holes with wood filler if needed and let dry.
Protecting Surrounding Areas
| Area to Protect | Protection Method |
|---|---|
| Countertops | Cover with drop cloth or plastic sheet |
| Floor | Lay down painter’s tape and cardboard |
| Appliances | Use masking tape to cover edges |
| Nearby Walls | Apply painter’s tape along edges |
Cutting And Fitting Moulding
Adding moulding to kitchen cabinets gives them a stylish look. Cutting and fitting moulding properly is key to a clean finish.
This guide explains how to measure, cut, and fit moulding with care and accuracy for great results.
Measuring And Marking Cuts
Measure the length of the cabinet edges where you want to add moulding. Use a tape measure for accuracy.
Mark your cut lines clearly with a pencil. Double-check each measurement before cutting to avoid mistakes.
- Measure twice, cut once
- Mark the inside edge of the moulding
- Note angles if corners are not 90 degrees
Using A Miter Saw For Precision
A miter saw helps you cut moulding pieces at exact angles. It is the best tool for clean corners.
Set the saw to the right angle, usually 45 degrees for corners. Hold the moulding firmly while cutting.
- Use a sharp blade for smooth cuts
- Cut slowly to avoid splintering
- Wear safety goggles during cutting
Dry Fitting Moulding Pieces
Before attaching, place the moulding pieces against the cabinets to check fit. This is called dry fitting.
Look for gaps or misaligned corners. Adjust cuts or sand edges if needed for a perfect fit.
- Check all corners and joints
- Make small adjustments carefully
- Ensure moulding sits flush against cabinets
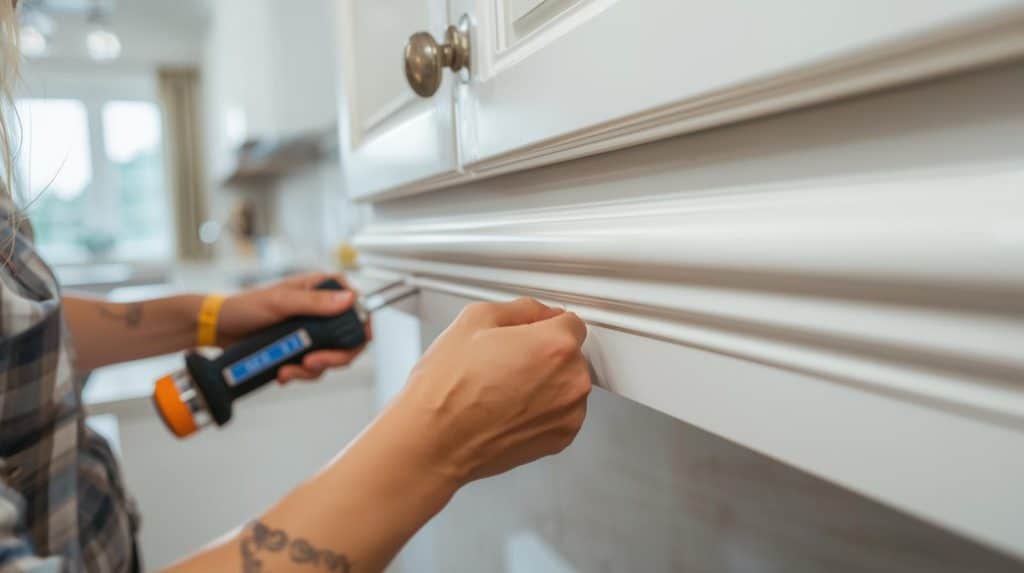
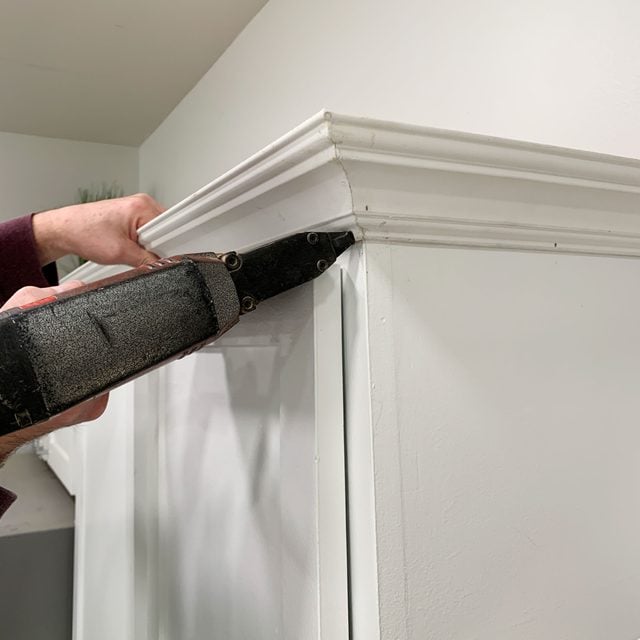
Attaching Moulding To Cabinets
Adding moulding to kitchen cabinets can improve their look. It adds detail and style to plain surfaces. Attaching moulding is a simple process with the right tools and steps.
This guide covers how to attach moulding securely and neatly. You will learn about using adhesive and nails, aligning the moulding, and fixing small gaps or holes.
Applying Adhesive And Nails
Start by applying a strong wood adhesive on the back of the moulding. This helps hold the moulding in place. Next, use finishing nails for extra strength. Nails keep the moulding secure while the glue dries.
- Apply a thin line of wood glue on the moulding edge.
- Press the moulding firmly against the cabinet surface.
- Use a nail gun or hammer to drive finishing nails evenly.
- Place nails about every 12 inches along the moulding.
- Wipe off any excess glue before it dries.
Ensuring Proper Alignment
Proper alignment is key for a neat finish. Make sure the moulding is straight and fits well against the cabinet edges. Use a level or ruler to check placement as you go. Adjust the moulding before the glue sets.
- Work in small sections to keep control.
- Clamp the moulding if needed to hold it steady.
- Check corners carefully for tight joints.
- Use painter’s tape to hold moulding temporarily.
Filling Gaps And Nail Holes
After the moulding is attached, small gaps and nail holes may appear. Fill these with wood filler to create a smooth surface. Once dry, sand the filler gently. This prepares the moulding for painting or staining.
| Material | Purpose | Application Tips |
|---|---|---|
| Wood filler | Fills gaps and holes | Use a putty knife to apply evenly |
| Sandpaper (120 grit) | Smooths dried filler | Sand lightly to avoid damage |
| Paint or stain | Finishes the moulding | Match cabinet color for best look |
Credit: www.familyhandyman.com
Finishing Touches
Adding moulding to kitchen cabinets can change the whole look. After installation, finishing touches make it look smooth and complete. These steps help your moulding fit perfectly and last longer.
Focus on sanding, painting or staining, and reinstalling hardware. Each step gives your cabinets a polished and professional appearance.
Sanding And Smoothing Edges
Sanding removes rough spots and sharp edges on the moulding. This makes the surface ready for paint or stain. Use fine-grit sandpaper for a smooth finish.
- Sand all edges gently to avoid damage.
- Wipe away dust with a damp cloth.
- Check for any gaps or uneven areas.
- Fill gaps with wood filler and sand again once dry.
Painting Or Staining Moulding
Choose paint or stain that matches your kitchen style. Paint covers the wood completely. Stain highlights the wood grain. Both protect the moulding from moisture and wear.
| Type | Advantages | Tips |
|---|---|---|
| Paint | Bright colors, hides imperfections | Use primer first for best results |
| Stain | Shows wood grain, natural look | Apply evenly with a cloth or brush |
Reinstalling Hardware
After painting or staining, put the hardware back on the cabinets. This includes handles, knobs, and hinges. Make sure screws are tight and aligned.
Use this checklist to reinstall hardware:
- Align hardware with original holes
- Use a screwdriver to secure screws firmly
- Check that handles turn or pull smoothly
- Replace any damaged screws or hardware pieces
Maintenance Tips
Adding moulding to kitchen cabinets can improve their look. Keeping them clean and safe helps them last longer.
Proper care stops damage and keeps moulding looking fresh. Learn easy ways to clean and protect your cabinets.
Cleaning Moulded Cabinets
Use a soft cloth or sponge to clean moulded cabinets. Avoid rough scrubbing to protect the moulding’s shape.
Warm water and mild soap work best for removing dirt. Rinse with a damp cloth and dry the surface well.
- Dust cabinets regularly with a soft cloth
- Use mild soap and water for cleaning
- Do not use harsh chemicals or abrasive cleaners
- Dry cabinets completely to prevent moisture damage
Preventing Damage Over Time
Keep moulding safe by avoiding heavy impacts and scratches. Be careful when moving items near the cabinets.
Control kitchen humidity to stop warping or peeling. Use a vent or fan while cooking to reduce moisture build-up.
- Handle cabinets gently to avoid dents
- Fix loose moulding pieces quickly
- Keep kitchen dry and well-ventilated
- Use protective pads on cabinet edges if needed
Frequently Asked Questions
What Tools Are Needed To Add Moulding To Cabinets?
You need a miter saw, measuring tape, wood glue, nails, a hammer, and sandpaper. These tools help cut, attach, and finish the moulding neatly.
How Do I Measure For Cabinet Moulding?
Measure the cabinet’s edges where moulding will go. Add extra length for miter cuts. Accurate measurement ensures a perfect fit and professional look.
Can I Paint Moulding After Installation?
Yes, painting moulding after installation is common. It helps match your kitchen décor and protects the wood. Use primer and paint for best results.
What Type Of Moulding Suits Kitchen Cabinets?
Crown, base, or decorative moulding styles suit cabinets well. Choose styles that complement your kitchen design and cabinet shape for a cohesive appearance.
Conclusion
Adding moulding to kitchen cabinets brings a fresh, stylish look. It can make your kitchen feel warmer and more inviting. The process is simple with the right tools and patience. Choose moulding that matches your style and paint it if needed.
Take your time to measure and fit pieces carefully. Small details can change the whole room’s appearance. Enjoy your updated kitchen and the pride of a DIY project. This easy upgrade adds charm without much cost or effort.


