
How to Bake No Knead Sourdough Bread: Easy Homemade Recipe for Crispy Crust and Soft Interior
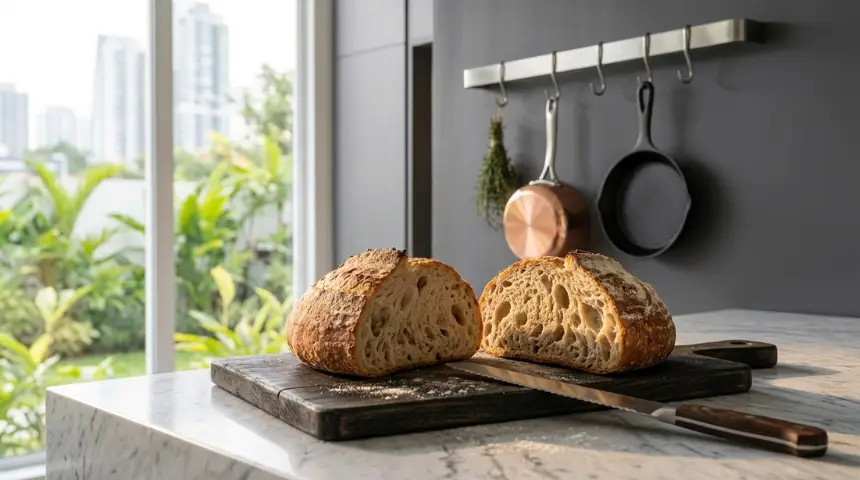
Imagine the aroma of freshly baked bread filling your home, the crisp crust crackling as you slice through to reveal a soft, chewy interior. Sounds heavenly, right?
If you’ve ever dreamt of baking your own sourdough bread but felt intimidated by the intricate process, there’s good news. You don’t need to be a professional baker or spend hours kneading to create a perfect loaf. With the no-knead sourdough method, you can achieve bakery-quality bread with minimal effort.
This simple yet rewarding technique is perfect for busy schedules, allowing you to enjoy homemade bread without the hassle. Ready to impress yourself and your taste buds? Dive into the secrets of no-knead sourdough bread and discover how easy it can be to bake your own delicious loaf at home.

Credit: www.youtube.com
Why Choose No Knead Sourdough
No knead sourdough bread is easy to make at home. It needs less effort but tastes great.
This way is perfect for beginners and busy people who want fresh bread.
Benefits Of No Knead Method
No knead bread uses time instead of hard work to develop gluten. This makes the dough soft and airy.
It also needs fewer tools and less cleanup. You just mix, wait, and bake.
- Less physical effort and no special skills needed
- Long fermentation improves bread flavor and texture
- Uses simple ingredients and basic kitchen tools
- Flexible timing fits busy schedules
- Produces bread with a nice crust and soft inside
What Makes Sourdough Unique
Sourdough uses natural wild yeast and bacteria to rise. This makes the bread taste tangy and fresh.
The long fermentation helps break down gluten and makes the bread easier to digest.
- Uses a natural starter instead of commercial yeast
- Has a slightly sour and complex flavor
- Creates a chewy texture with a crunchy crust
- Lasts longer without preservatives
- Supports gut health with natural fermentation
Essential Ingredients
Baking no knead sourdough bread needs only a few key ingredients. Each one plays a vital role in the bread’s taste and texture.
Understanding these ingredients helps you make great bread every time. Let’s look at the main components you need.
Flour Types
Flour is the base of your sourdough bread. The type of flour affects the bread’s flavor and crumb.
Many bakers use a mix of flours to get the best result.
- All-purpose flour:Easy to find and works well for beginners.
- Bread flour:Higher protein content makes a chewier texture.
- Whole wheat flour:Adds a nutty flavor and more nutrients.
- Rye flour:Gives a strong, earthy taste and helps fermentation.
Sourdough Starter
The sourdough starter is a natural mix of wild yeast and bacteria. It helps the dough rise and adds flavor.
You need to feed the starter regularly to keep it active and strong. A healthy starter makes better bread.
- Use a bubbly and active starter for best results.
- Feed it with equal parts flour and water by weight.
- Keep it at room temperature before use.
Water And Salt
Water hydrates the flour and helps the dough form. The water quality can affect the bread’s taste.
Salt adds flavor and controls the fermentation speed. It also strengthens the dough’s structure.
- Use clean, filtered water without chlorine.
- Add salt after mixing the flour and water.
- Typical salt amount is about 2% of the flour weight.
Preparing Your Starter
Preparing a sourdough starter is the first step to baking no knead bread. The starter captures wild yeast and bacteria for natural fermentation.
Careful feeding and watching your starter helps it grow strong and ready for baking. This guide covers feeding schedules and signs of readiness.
Feeding Schedule
Feed your starter regularly to keep it active. Consistent feeding helps the yeast multiply and keeps the starter healthy.
- Discard half of the starter before each feeding to keep the balance.
- Add equal parts flour and water to the starter after discarding.
- Feed your starter every 12 hours for the first 3 days.
- After 3 days, feed once every 24 hours if kept at room temperature.
- Store in a warm spot, ideally between 70°F and 75°F (21°C to 24°C).
Signs Of Readiness
Knowing when your starter is ready is key. A ready starter has strong bubbles, a pleasant smell, and doubles in size.
| Sign | Description |
| Doubling in Size | The starter should rise to twice its original volume within 4 to 6 hours after feeding. |
| Bubbles | Look for many small bubbles throughout the starter showing active fermentation. |
| Smell | The starter should smell fresh and slightly tangy, not sour or rotten. |
| Float Test | A spoonful of starter will float in water when it is ready to use for baking. |
Mixing The Dough
Mixing the dough is the first step in baking no knead sourdough bread. It helps combine all ingredients evenly.
Proper mixing creates the right texture for your bread. This process takes only a few minutes.
Measuring Ingredients
Accurate measuring ensures your bread turns out well. Use a kitchen scale for best results.
Measure each ingredient carefully to keep the dough balanced. Small changes can affect the bread’s rise.
- Flour: Use all-purpose or bread flour
- Water: Use room temperature water
- Sourdough starter: Active and bubbly
- Salt: For flavor and dough strength
Combining Components
Mix flour, water, and sourdough starter in a large bowl. Stir with a spoon or spatula until combined.
Add salt last and mix well. The dough will be sticky and shaggy, which is normal for no knead bread.
- Start by mixing flour and water
- Let this mixture rest for 30 minutes (autolyse)
- Add sourdough starter and salt
- Mix until all ingredients are combined
Bulk Fermentation
Bulk fermentation is the first rise after mixing your sourdough dough. It helps develop flavor and texture. This step is very important for no knead sourdough bread.
During bulk fermentation, the dough ferments as the yeast and bacteria create gas and acids. This process makes the bread airy and tasty.
Ideal Fermentation Time
Fermentation time depends on the dough and room conditions. Usually, it lasts from 3 to 6 hours. Watch the dough, not the clock.
The dough should grow in size but not double. It should look bubbly and soft. If it rises too long, it may lose strength.
- Check the dough after 3 hours
- Look for a 30-50% size increase
- Stop fermentation if dough feels very soft
Temperature Tips
Temperature controls how fast the dough ferments. Warmer temperatures speed up fermentation, cooler ones slow it down. Ideal range is 70°F to 75°F (21°C to 24°C).
If your kitchen is cold, find a warm spot like near a heater or oven light. Avoid hot places over 80°F (27°C), which can harm the dough.
- Keep dough covered to retain heat
- Use a proofing box for stable temperature
- Adjust fermentation time based on room temperature
Credit: garturstitchfarm.com
Shaping The Loaf
Shaping your no-knead sourdough loaf is a gentle and careful process. It helps form the dough into a tight ball ready for baking.
This step improves the bread’s texture and helps it rise well in the oven.
Gentle Folding Techniques
Use soft hands to fold the dough without pressing out all the air. Folding helps build strength in the dough.
- Lightly flour your work surface to prevent sticking.
- Carefully lift one side of the dough and fold it over the center.
- Turn the dough and repeat folding on all sides.
- Use a bench scraper if the dough feels sticky or loose.
- Handle the dough slowly to keep the bubbles inside.
Creating Surface Tension
Surface tension gives the loaf a smooth skin and helps it hold shape during baking. It is key for a nice crust.
| Technique | Description |
|---|---|
| Pull and Tighten | Gently pull the edges of the dough under to create a tight ball. |
| Use Your Hands | Cup your hands around the dough and spin it to build tension. |
| Rest and Relax | Let the dough rest briefly to relax gluten before final shaping. |
Proofing And Final Rise
Proofing is the time when your sourdough dough rests and rises before baking. It helps develop flavor and texture in the bread.
The final rise is important to get a light and airy loaf. This step takes place after shaping the dough and before baking.
Using A Banneton Or Bowl
A banneton is a basket designed to support dough during proofing. It helps the dough keep its shape and creates a nice crust pattern.
If you do not have a banneton, use a bowl lined with a clean kitchen towel. Dust the towel with flour to prevent sticking.
- Bannetons provide air circulation around the dough.
- Bowl and towel method is a good alternative.
- Both help the dough rise evenly and keep its form.
Cold Vs Room Temperature Proofing
Cold proofing means placing the dough in the fridge during the final rise. This slows down fermentation and builds flavor.
Room temperature proofing is faster and best when you want to bake soon. It lets the dough rise in a few hours.
- Cold proofing: 8 to 24 hours in the fridge
- Room temperature proofing: 2 to 4 hours on the counter
- Cold proofing gives stronger sourdough flavor
- Room temperature proofing is quicker for same-day baking

Credit: food52.com
Baking The Bread
Baking no knead sourdough bread is simple with the right steps. The baking process gives the bread its crust and texture.
This guide covers oven preparation, using a Dutch oven, and the right baking time and temperature.
Preheating The Oven
Preheating the oven ensures even heat for baking. Set your oven to 450°F (230°C) at least 30 minutes before baking.
- Place a baking stone or heavy tray inside if you do not use a Dutch oven.
- Make sure the oven reaches full temperature to create steam for a crispy crust.
- Do not open the oven door often, to keep the heat steady.
Using A Dutch Oven
A Dutch oven helps trap steam, baking the bread evenly. Preheat it in the oven before placing the dough inside.
| Step | Action |
|---|---|
| 1 | Preheat Dutch oven with the oven at 450°F (230°C) for 30 minutes. |
| 2 | Carefully remove the Dutch oven and place your dough inside. |
| 3 | Cover with the lid to trap steam during the first baking phase. |
| 4 | Remove lid halfway through baking for crust to brown. |
Baking Time And Temperature
Bake the sourdough bread at 450°F (230°C) for 40 to 50 minutes. The bread needs steam to develop a crisp crust.
- Bake covered for the first 20 to 25 minutes to keep moisture inside.
- Remove the cover and bake for another 20 to 25 minutes to brown the crust.
- The bread is done when it sounds hollow if tapped on the bottom.
Cooling And Storing
After baking no knead sourdough bread, cooling and storing it properly keeps it fresh. These steps help keep the bread’s texture and flavor at their best.
Letting the bread cool fully is important before storing. Proper storage slows down staling and prevents mold growth.
Resting The Bread
Remove the bread from the oven and place it on a wire rack. This lets air circulate around the loaf and stops moisture from building up underneath.
Cool the bread for at least one hour. The crust will harden and the inside will finish baking as it cools. Cutting too soon may cause a gummy texture.
Storage Tips For Freshness
Store your sourdough bread well to keep it fresh and tasty. Here are some tips to follow:
- Wrap the bread in a clean cotton or linen cloth to allow breathing.
- Keep it at room temperature if you plan to eat it within 2–3 days.
- Use a paper bag or bread box for storage to maintain crust crispness.
- For longer storage, slice the bread and freeze it in a sealed plastic bag.
- Thaw frozen slices at room temperature or toast them directly.
- Avoid storing bread in the refrigerator as it dries out quickly.
Troubleshooting Common Issues
Baking no knead sourdough bread can bring great results. Sometimes, problems happen. Knowing how to fix these helps you bake better bread.
Here are solutions for dense loaves, crust problems, and starter troubles. Use these tips to improve your baking experience.
Dense Loaf Solutions
A dense loaf usually means the dough did not rise enough or the gluten did not develop well. Try these fixes to get a lighter bread.
- Use active starter with bubbles and a pleasant sour smell.
- Allow the dough to ferment longer at room temperature for better rise.
- Increase hydration by adding a little more water to the dough.
- Make sure to fold the dough gently during fermentation to help gluten form.
- Bake with steam in the oven for the first 20 minutes to improve oven spring.
Crust Problems
Crust issues like too hard, too soft, or pale crust can affect bread texture and taste. Adjust your baking to fix these problems.
| Problem | Cause | Solution |
| Too hard crust | Overbaking or too high temperature | Lower oven temperature and bake less time |
| Too soft crust | Not enough baking time or no steam | Bake longer and add steam in the oven |
| Pale crust | Oven temperature too low | Increase oven heat slightly |
Starter Troubleshooting
A healthy starter is key for good sourdough. If your starter has problems, try these tips.
- If your starter smells bad or has mold, discard and start fresh.
- If your starter is not rising, feed it regularly every 12 hours with equal parts flour and water.
- Keep the starter at a warm place around 70°F (21°C) for best activity.
- Use whole grain flour to boost fermentation if needed.
Frequently Asked Questions
What Is No Knead Sourdough Bread?
No knead sourdough bread requires minimal effort, skipping the traditional kneading process. It relies on long fermentation for gluten development and flavor, making it ideal for beginners and busy bakers.
How Long Does No Knead Sourdough Take To Bake?
No knead sourdough bread typically takes 12 to 24 hours including fermentation and rising time. Baking itself lasts around 40 to 50 minutes at high heat for a crisp crust.
Can I Use Store-bought Yeast For No Knead Sourdough?
No, traditional no knead sourdough uses natural wild yeast from a starter, not commercial yeast. This creates the signature tangy flavor and chewy texture unique to sourdough.
How Do I Maintain A Sourdough Starter For No Knead Bread?
Feed your starter regularly with equal parts flour and water. Store it at room temperature for active use or refrigerate for slower fermentation and less frequent feeding.
Conclusion
Baking no knead sourdough bread is simple and fun. Just mix ingredients, wait, and bake. No hard work or special tools needed. The crust turns crispy, and the inside stays soft. Fresh homemade bread tastes better than store-bought. Practice a few times to get the best results.
Enjoy baking and sharing this tasty bread with family. This easy recipe fits busy schedules and small kitchens. Try it today and enjoy fresh sourdough anytime.


