
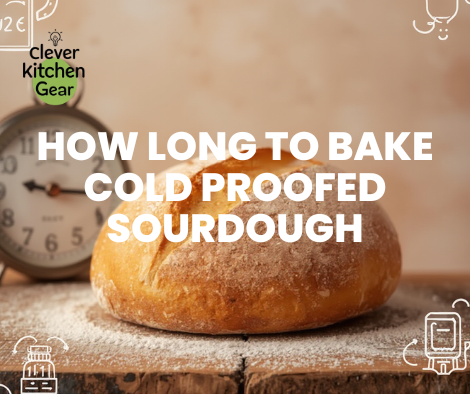
Perfect Sourdough: Baking Time Secrets
You know baking sourdough is rewarding. You also know it is challenging. One key step is the cold proofing process—it creates that perfect, airy crumb.
But How Long to Bake Cold Proofed Sourdough? This is key to baking bread like a bakery. We will uncover the best baking time for cold proofed sourdough to help you achieve that golden crust and soft, flavorful interior.
Soon you will feel confident in your skills. You will impress everyone with your great creations. Stay with us. We will elevate your sourdough game right now.

Credit: countryroadssourdough.com
Baking Time Basics
Baking cold dough needs careful timing. Bake time depends on the dough’s size and its temperature.
Knowing the basics helps you get a perfect crust. It also ensures a soft inside. Baking too long or too short changes everything.
Factors Influencing Bake Time
Many things change the needed bake time. Dough weight and oven temperature are most important.
The shape of your bread also matters. Round loaves take different times than long ones. The oven type and heat source affect baking, too.
-
Dough size and total weight.
-
Oven heat and the type of oven used.
-
Bread shape and how thick it is.
-
The amount of water in the dough.
-
Using steam or a special baking pot.
Cold Proofing Impact
Cold proofing develops flavor. It strengthens the dough structure. It also firms the dough before baking.
Baking cold proofed dough may need more time. The dough is colder. The oven must heat it all the way through.
-
Cold dough needs extra time to cook completely.
-
Dough temperature when placed in the oven affects the total time.
-
Longer cold proofing changes the dough density. This changes bake time.
-
Preheating your oven ensures heat is even.

Credit: www.reddit.com
Ideal Oven Temperature
Baking cold sourdough needs the right oven heat. High heat helps create a crispy crust. It also gives a soft inside.
Most bakers use heat between450°F and 500°F. This high heat works well for sourdough.
Preheating Tips
Preheat your oven for at least 30 minutes. This ensures the heat is even inside.
Use a baking steel or stone. This keeps the temperature steady. Place it on the middle rack for the best result.
-
Set the oven to475°F to 500°F.
-
Preheat for 30 minutes minimum time.
-
Use a baking stone or baking steel.
-
Put the stone on the oven’s middle rack.
Temperature Variations
Some ovens do not match their settings. Use an oven thermometer to check the true heat.
Adjust the heat if the bread browns too fast. Lower the heat if the crust burns easily.
-
Lower the oven to 450°F if the crust burns.
-
Raise the oven near 500°F if bread is too pale.
-
Check the real temperature with a thermometer.
-
Adjust baking time if the temperature changes.
Checking Bread Doneness
Baking cold proofed sourdough takes time and care. Knowing when the bread is done is most important.
Simple checks tell you if the bread is baked. This helps you avoid underbaking or burning.
Visual Cues
Look at the crust color. A deep golden brown means it is often ready.
The crust should be firm and crisp. It should not be soft or pale. Cracks on the surface show good baking.
-
Crust color must be deep golden brown.
-
The surface should feel crisp and firm.
-
Look for natural cracks on the top.
Internal Temperature
Use a thermometer to check the inside. The correct heat means the bread is fully baked.
The best temperature is between 200°F and 210°F (93°C to 99°C). This ensures the inside is set.
-
Insert the thermometer into the loaf center.
-
The temperature must be 200°F to 210°F (93°C to 99°C).
-
Higher temperature means a drier inside.
Tap Test
Tapping the bottom checks for doneness. A hollow sound means the bread is cooked through.
The bread needs more time if the sound is dull. This test works well after the loaf cools slightly.
-
Remove the bread from the oven. Let it cool slightly.
-
Tap the bottom of the loaf with your fingers.
-
Listen for a hollow, ringing sound.
- Baking scientists recommend a final ‘naked’ step: “After the bread comes out of the Dutch oven, if the crust still feels slightly soft or moist, take it out of the pot and place it directly on the oven rack for the final 5 minutes. This direct heat exposure dries the crust fully and creates the brittle, crackly texture associated with bakery-quality bread. This quick, easy step is the best way to avoid a ‘leathery’ crust and ensure a hollow tap and a perfect crunch.“
Adjusting Timing For Loaf Size
Baking this sourdough needs time changes. Loaf size affects the needed bake time. Small and large loaves need different times.
We must understand these timing changes. This avoids underbaking or overbaking. Use these ideas for any size loaf.
Small Loaves
Small loaves bake faster. Heat gets to the center quickly. Sizes range from 500g to 750g.. Baking time is usually 25 and 35 minutes at 450°F (230°C).
-
Preheat the oven well for even heat.
-
Check for a golden crust after 25 minutes.
-
Use a thermometer to check for 200°F (93°C) inside.
-
Reduce baking time if the crust browns too fast.
Large Loaves
Large loaves take more time to bake. Heat reaches the center slowly. They usually weigh over $900\text{g}$. Baking time is $40$ to $60$ minutes at $450^\circ \text{F}$.
| Loaf Weight | Suggested Baking Time | Internal Temperature Goal |
|---|---|---|
| 900g – 1.2kg | 40 – 50 minutes | 200°F (93°C) |
| 1.3kg – 1.5kg | 50 – 60 minutes | 205°F (96°C) |
| Over 1.5kg | 60+ minutes | 210°F (99°C) |
Using Steam For Crust
Steam is very important for baking sourdough. It helps create a shiny, crisp crust.
Adding steam helps the cold proofed dough crust. Let’s see how steam helps and how to add it.
Benefits Of Steam
Steam keeps the dough surface wet in the oven. This prevents the crust from setting too soon.
This allows the bread to expand completely. It also helps the crust become thin and crispy.
-
Improves oven spring for a better rise.
-
Creates a glossy and crunchy crust.
-
Stops the crust from cracking too early.
-
Locks in moisture inside the bread.
How To Add Steam
We have easy ways to add steam. Place a hot water pan at the oven bottom.
Spray water inside the oven. Do this right after putting in the bread. This creates fast steam.
-
Use a metal pan with hot water on the oven floor.
-
Spray water inside the oven with a bottle.
-
Bake in a covered Dutch oven to trap steam.
-
Add ice cubes to the hot pan for long steam.
Common Baking Mistakes
Baking this cold dough can be hard. Small mistakes can change the final bread.
Knowing signs of under or overbaking helps. You can fix problems quickly.
Underbaking Signs
Underbaked sourdough looks pale. It feels doughy. It may collapse when it cools.
-
The crust lacks color. It feels soft.
-
The bread sounds dull when tapped underneath.
-
The inside is gummy or wet. It is not airy.
-
The loaf feels heavy for its size.
-
Slices tear easily instead of cutting clean.
Overbaking Issues
Overbaking makes the bread dry. It creates a very hard crust. It also darkens the inside.
| Issue | Cause | Effect |
| Crust too hard | Baking too long or too hot. | Cracks or burns on the crust. |
| Dry crumb | Too much oven time. | The inside crumbles when you slice it. |
| Dark crust | Oven temperature is too high. | Burnt spots, bitter taste. |
| Hollow tap sound | Excess baking. | Overcooked, dry bread. |
Tips For Consistent Results
Baking cold proofed sourdough can be hard. Knowing the correct time helps you bake well.
Tracking your heat and time improves results every time.
Timing And Temperature Logs
Keep a record of your bake times and heat settings. This helps you find your best settings.
-
Note the exact temperature you use.
-
Record how long the bread stays in the oven.
-
Write down the crust color and texture.
-
Compare results to adjust time next time.
Adjusting For Altitude
Altitude changes how your sourdough bakes. Higher places need different baking times.
| Altitude | Oven Temperature | Bake Time |
| Sea Level (0-500 ft) | 450°F (232°C) | 35-40 minutes |
| Mid Altitude (1500-3500 ft) | 460°F (238°C) | 30-35 minutes |
| High Altitude (3500+ ft) | 470°F (243°C) | 25-30 minutes |

Credit: www.reddit.com
Frequently Asked Questions
How Long Should You Bake Cold Proofed Sourdough?
Bake it for 35 to 45 minutes. Use an oven temperature of 450°F (232°C). The crust must be crisp and golden brown.
Does Baking Time Change After Cold Proofing Sourdough?
Yes, it often needs a slightly longer bake. This ensures the inside cooks fully. It also forms the crust well.
What Oven Temperature Is Best For Cold Proofed Sourdough?
Set your oven to 450°F (232°C). This high heat gives a tender inside and a crispy crust.
How Can I Tell When Cold Proofed Sourdough Is Done Baking?
The bread is ready when it sounds hollow when tapped. The crust should be firm and deep golden brown.
Conclusion
Baking cold proofed sourdough needs care. Start with the correct oven heat, around 450°F (230°C). Bake your bread for 30 to 45 minutes. The crust should turn golden brown. Tap the loaf. Listen for a hollow sound.
This sound means your bread is done. Let it cool before slicing. This keeps the texture perfect. Remember: every oven is different. Adjust times as necessary. Enjoy the fresh, tasty bread you make. Simple steps lead to great sourdough!
To see a quick, visual demonstration of the exact time and temperature split for baking a cold-proofed sourdough loaf in a Dutch oven—which guarantees maximum oven spring and a perfect crust—watch this easy guide:


