Imagine the aroma of freshly baked bread wafting through your kitchen. You can achieve this comforting scent without the hassle of kneading.
Curious about how long to bake no-knead bread to perfection? You're not alone. Many home bakers seek the simplicity and delicious results that come with this method. In this guide, we'll unravel the secrets of baking no-knead bread, ensuring you achieve that crusty exterior and soft, airy interior every time.
Whether you're a seasoned baker or a curious newcomer, this is your go-to resource for mastering no-knead bread. Keep reading to discover the perfect baking time and tips for that bakery-quality loaf right from your oven.

Credit: www.talesfromthekitchenshed.com
No-knead Bread Basics
No-knead bread is easy to make. It needs little effort and time. This method uses long fermentation to develop gluten.
You mix ingredients, let dough rest, and then bake. This way, bread becomes soft and crusty without kneading.
Why No-knead Works
Long resting lets the flour absorb water well. Natural gluten forms slowly, giving good texture. The slow rise also adds flavor.
Essential Ingredients
Few ingredients make no-knead bread simple. You need flour, water, yeast, and salt. Each has a role in baking.
- Flour:The base of the dough.
- Water:Hydrates flour and activates yeast.
- Yeast:Helps dough rise by producing gas.
- Salt:Adds flavor and controls yeast activity.
Choosing The Right Flour
| Flour Type | Protein Content | Effect on Bread |
|---|---|---|
| All-Purpose Flour | 10-12% | Good for soft and light bread |
| Bread Flour | 12-14% | Creates chewier and stronger bread |
| Whole Wheat Flour | 13-14% | Gives nutty flavor and dense texture |

Credit: www.melaniemay.com
Preparing The Dough
Baking no-knead bread starts with preparing the dough correctly. The dough is simple but needs care to get good results.
This section explains how to mix, ferment, and handle the sticky dough for the best bread.
Mixing Techniques
Mix flour, water, salt, and yeast in a large bowl. Use a spoon or your hand to combine them.
Mix just until all ingredients are wet. Do not overmix. The dough will be rough and sticky.
- Use room temperature water for better yeast activity
- Stir gently to avoid tough dough
- Stop mixing when no dry flour remains
Fermentation Time
Let the dough rest at room temperature to ferment. This helps develop flavor and texture.
Fermentation usually takes 12 to 18 hours. The dough should double in size and look bubbly.
- Cover the bowl with plastic wrap or a clean towel
- Keep dough in a warm place, about 70°F (21°C)
- Longer fermentation improves taste but do not exceed 24 hours
Handling Sticky Dough
The no-knead dough is very sticky. Use wet hands or a spatula to handle it easily.
Do not add too much flour. This can make the bread dry and dense.
- Wet your hands before touching the dough
- Use a rubber spatula to fold the dough gently
- Place dough on a floured surface only if necessary
Baking Time And Temperature
Baking no-knead bread needs careful attention to time and temperature. The right settings help the bread rise and bake perfectly.
Adjusting oven heat and knowing when to check your bread can improve your baking results every time.
Optimal Oven Settings
Set your oven to 450°F (232°C) for the best no-knead bread bake. This temperature helps create a crispy crust and a soft center.
- Preheat the oven for at least 30 minutes before baking.
- Use a heavy pot or Dutch oven to hold heat well.
- Cover the bread with a lid or foil for the first 30 minutes.
- Remove the cover and bake for 15 to 20 more minutes to brown the crust.
Adjusting For Different Ovens
Every oven heats differently. Some run hot, others cooler. Adjust baking time and temperature to match your oven’s behavior.
| Oven Type | Temperature | Baking Time |
| Gas Oven | 435°F (224°C) | 40–45 minutes |
| Electric Oven | 450°F (232°C) | 35–40 minutes |
| Convection Oven | 425°F (218°C) | 30–35 minutes |
When To Check Doneness
Check your bread after the full baking time. Look for a deep golden crust and a hollow sound when tapped.
- The crust should feel firm and crisp.
- Tap the bottom of the loaf; it should sound hollow.
- Use a thermometer if unsure; the inside should be 190°F (88°C).

Credit: leitesculinaria.com
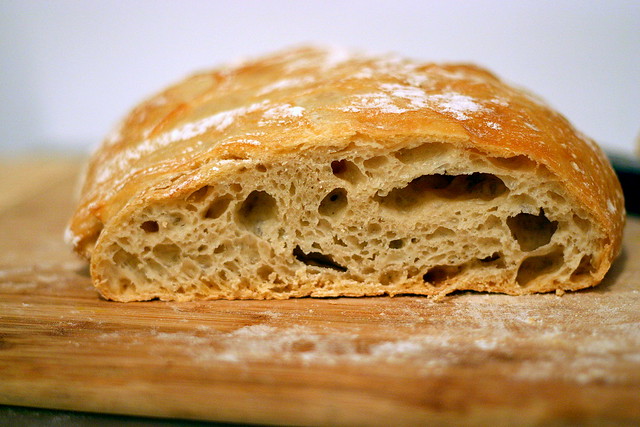
Achieving The Perfect Crust
Baking no-knead bread is simple and yields great results. One key goal is to get a crust that is crispy and golden.
The crust adds flavor and texture to the bread. Using the right baking tools and techniques helps make it perfect.
Using Dutch Ovens
Dutch ovens keep heat steady and trap steam while baking. This helps the bread rise and develop a crunchy crust.
Preheat the Dutch oven before adding the dough. Bake covered for most of the time, then uncover to brown the crust.
- Preheat Dutch oven at 450°F (230°C) for 30 minutes
- Place dough inside carefully
- Bake covered for 30 minutes
- Remove lid and bake 10-15 more minutes
Steam For Crust Texture
Steam keeps the bread surface moist at first. This allows the crust to expand and become crisp.
Add steam by putting water in a hot pan or spraying water inside the oven. Do this only in the first 10-15 minutes.
- Place a pan with hot water in the oven
- Or spray water on oven walls before baking
- Remove steam source after 15 minutes
- Finish baking without steam for a crisp crust
Cooling And Storage Tips
Let the bread cool on a wire rack. Cooling helps the crust stay crisp and avoids sogginess.
Store bread in a paper bag or bread box. Avoid plastic bags to keep the crust from getting soft.
- Cool bread at least 1 hour before slicing
- Use wire rack for airflow
- Store in paper bag or bread box
- Avoid plastic bags to keep crust crisp
Troubleshooting Common Issues
Baking no-knead bread is simple, but some problems can happen. Knowing how to fix them helps you get better bread.
Here are common baking issues and tips to solve them. This will make your bread soft and tasty every time.
Dense Or Underbaked Bread
Dense bread often means the dough did not rise enough or was baked too soon. Underbaked bread feels wet inside.
Make sure to let the dough rise until it doubles in size. Bake the bread until it sounds hollow when tapped.
- Use fresh yeast or baking powder
- Let dough rise in a warm place
- Check the internal temperature; it should be about 190-210°F (88-99°C)
- Extend baking time if needed
Too Hard Or Burnt Crust
A crust that is too hard or burnt means the oven temperature was too high or baking took too long. This can make bread tough.
Try lowering the oven temperature by 25°F (about 15°C). Cover the bread with foil if the crust browns too fast.
- Use an oven thermometer to check heat
- Bake at 375-450°F (190-230°C) depending on your recipe
- Place bread in the middle rack for even heat
- Cover with foil if crust darkens early
Uneven Baking
Uneven baking causes some parts of the bread to be overcooked while others stay raw or doughy. This affects taste and texture.
Make sure the dough is shaped evenly and the oven heats consistently. Rotate the bread halfway through baking for best results.
- Shape dough into an even ball or loaf
- Preheat oven fully before baking
- Use a baking stone or cast iron for steady heat
- Turn bread 180 degrees during baking
Frequently Asked Questions
How Long Does No-knead Bread Take To Bake?
No-knead bread typically bakes for 30 to 45 minutes at 450°F (230°C). This time ensures a crispy crust and soft interior.
What Is The Ideal Temperature For No-knead Bread?
The ideal baking temperature for no-knead bread is 450°F (230°C). This heat helps form a golden, crunchy crust.
Can I Bake No-knead Bread Longer For A Crispier Crust?
Yes, baking no-knead bread for an extra 5 to 10 minutes can make the crust crispier. Watch closely to avoid burning.
Should I Cover No-knead Bread During Baking?
Covering no-knead bread with a Dutch oven or lid for the first 20 minutes traps steam. This creates a perfect crust and crumb.
Conclusion
Baking no-knead bread takes patience and simple steps. Usually, 30 to 45 minutes in the oven is enough. Watch for a golden crust and hollow sound when tapped. Let the bread cool before slicing to keep its shape. This method saves time and effort but still gives tasty results.
Try it at home and enjoy fresh bread anytime. Easy, quick, and delicious—no kneading required.